
Exactly when I needed a good excuse for doing flow-based generative modeling research, I stumbled upon a ProcJam announcement. I needed a break from Spomenik development, it was early November and I had client work coming up in December so this was a perfect opportunity (yes, excuse).
I also wanted to do a small project as a starting point for doing long-term modeling research, but didn’t want to go in too deep without getting something into people’s hands. I just wanted to materialize the aesthetic I had in my head, do a proof-of-concept for the ideas I had lying around, and then package it up and give it to people. Later projects would hopefully expand on the insights I gained from the entire process.
Inspiration
Engineering + Art.
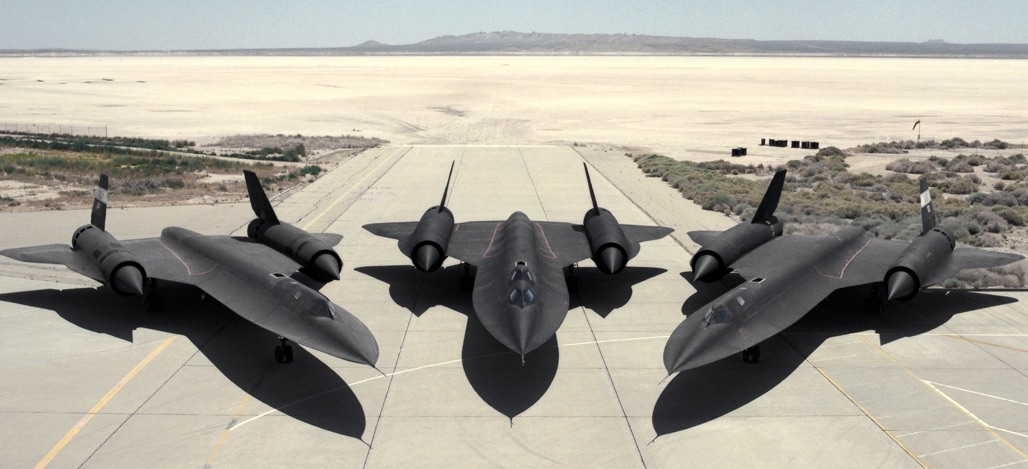
In the phenomenal Skunk Works book, Ben Rich documents his time as an employee of Lockheed’s Skunk Works division and tells the stories of Lockheed’s top-secret projects, one of which was the SR-71 Blackbird.
The Blackbird is/was a Mach 3 strategic reconnaissance aircraft. “Mach 3” means it was going three times the speed of sound. Missiles were fired in its direction a couple of times, but the evasion maneuver was simple – it just accelerated so the missiles couldn’t keep up.
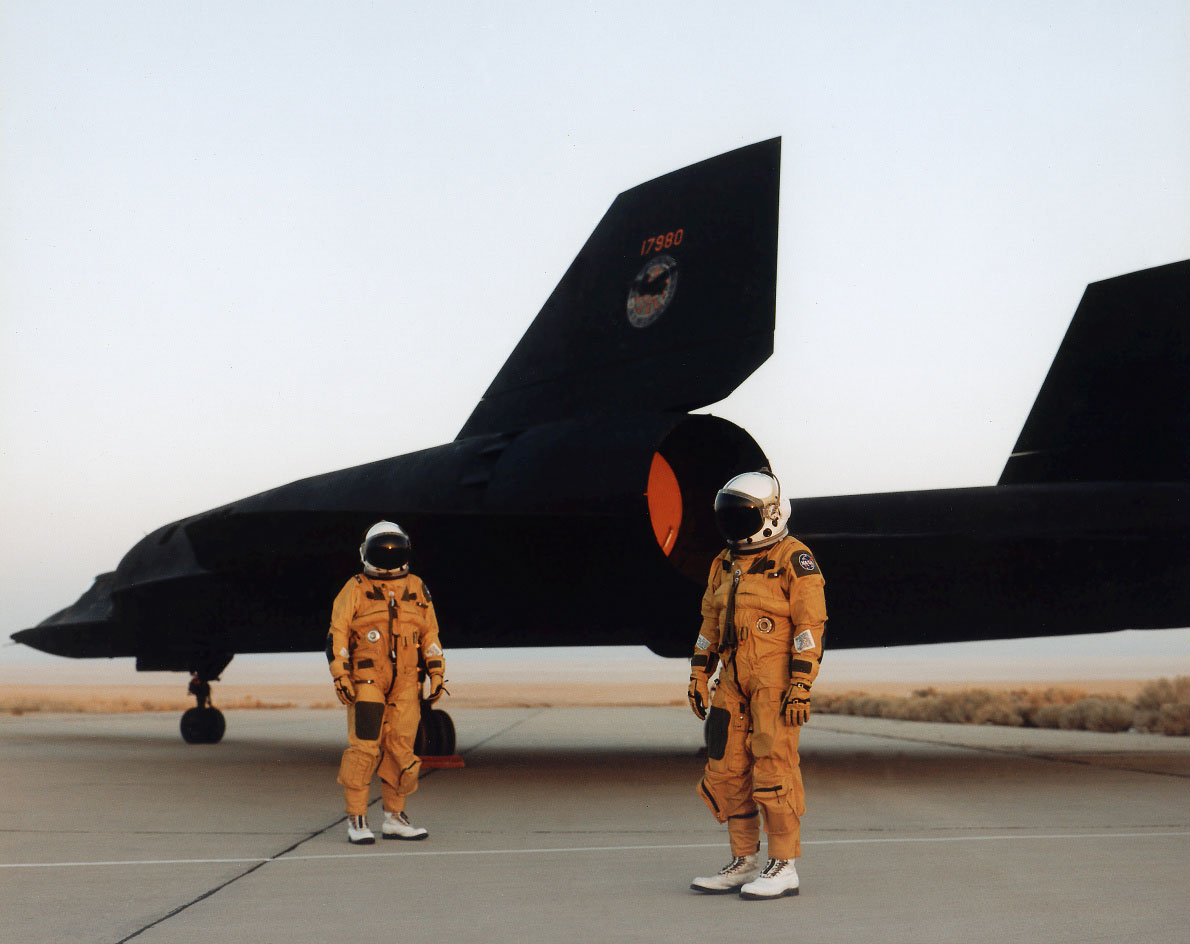
This plane was built in 1964 and it still holds the speed record. Pilots wore space suits.
But speed isn’t what inspires me about the SR-71, it’s the process of building it which is documented in the book, and the end result which to me is art just as much as it is an incredible feat of engineering.
The other (constant) source of inspiration was anything created by Lamborghini in the past 10 years, but most pointedly the Aventador.
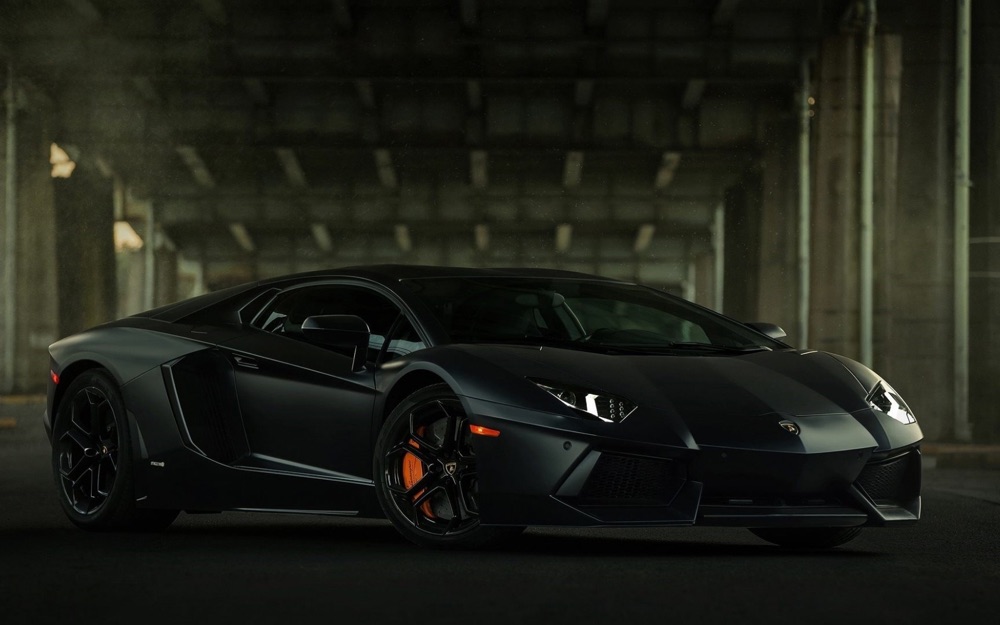
There’s stealth there, reminiscence of strike aircraft. If a car can resemble a weapon, I can’t think of a better example.
These two were the most influential when designing the aesthetic, but not literally. The goal was to explore and later expand on these early attempts at aerodynamics-inspired generative modeling tools.
System architecture
There are two architectural patterns I think are perfect for doing generative modeling, but I hadn’t had the chance to seriously use any of them in my projects:
- Modular geometry pipeline
- Reactive programming
I wanted to try them out, fit them together and ship a complete (if simple) product. If the approach proved appropriate, I’d use them in most of my future projects. So I started sketching.
I reached a nearly-final version
 My niece contributed to the pipeline design.
of the overall pipeline very quickly, because it all felt very natural. It would all start with a point cloud, which would get shaped by a vector field, then the newly created points would get triangulated into a mesh, which is finally mirrored in order to produce a symmetrical sculpture. I added the random seed generation step at the start of the pipeline only when I got the idea for keyboard input. It was very easy to add since the architecture was decoupled and modular.
My niece contributed to the pipeline design.
of the overall pipeline very quickly, because it all felt very natural. It would all start with a point cloud, which would get shaped by a vector field, then the newly created points would get triangulated into a mesh, which is finally mirrored in order to produce a symmetrical sculpture. I added the random seed generation step at the start of the pipeline only when I got the idea for keyboard input. It was very easy to add since the architecture was decoupled and modular.
Inspired by my earlier BRU-3 experiment, and (still) fascinated with Clojure’s data-first approach, I went on searching for a C# solution which shared similar ideas as Clojure’s transformation-based logic, but does so in an idiomatic way for the C# ecosystem. I’m a big fan of not forcing other languages’ idioms into your language of choice if you can get similar results in an idiomatic way. I also wanted to model a push-based, reactive system. So naturally, I came across C#’s Reactive Extensions.
I had a brief encounter with Rx, albeit not in C# land but in Scala land. Same idea. I started digging around and found this wonderful adaptation of Rx.NET for Unity called UniRx. If you’re doing any serious Unity coding, I highly recommend checking out this library.
Using (Uni)Rx, my pipeline would be dead simple. Each step would be a separate Unity component with two endpoints – input and output. On the input side, a component would ask for a number of components’ outputs it takes data from, and register a single output as its result:
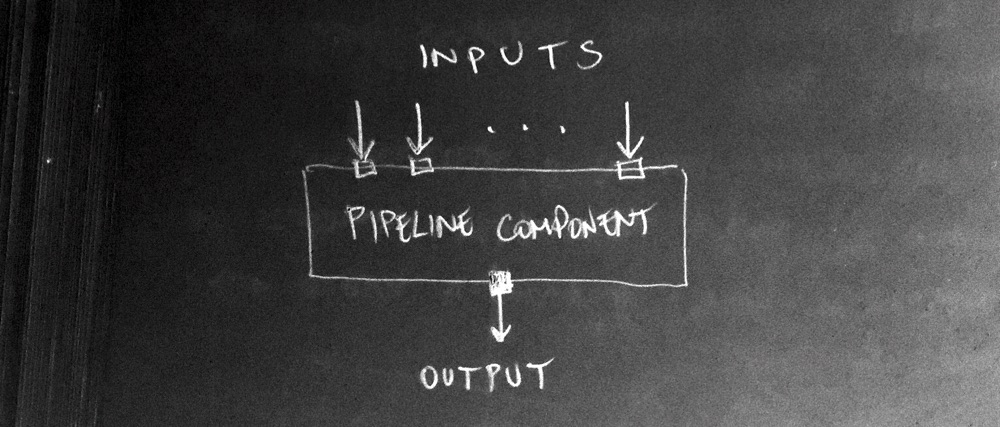
I could then freely interchange and interconnect components, attach them to arbitrary game objects, have master data sources which all components would source data out of, and so on. The best part about it is that fundamentally all the heavy lifting is performed by UniRx. A component doesn’t know who its result subscribers are, it just pushes them along. This is the complete opposite of the pull-based architecture I would get with a typical stateful component-based approach. The reactive components are practically stateless, since any output happens as a result of processing one or more inputs.
Jumping ahead in time here a bit (forgive), this is how the final architecture looks like in the shipped product:
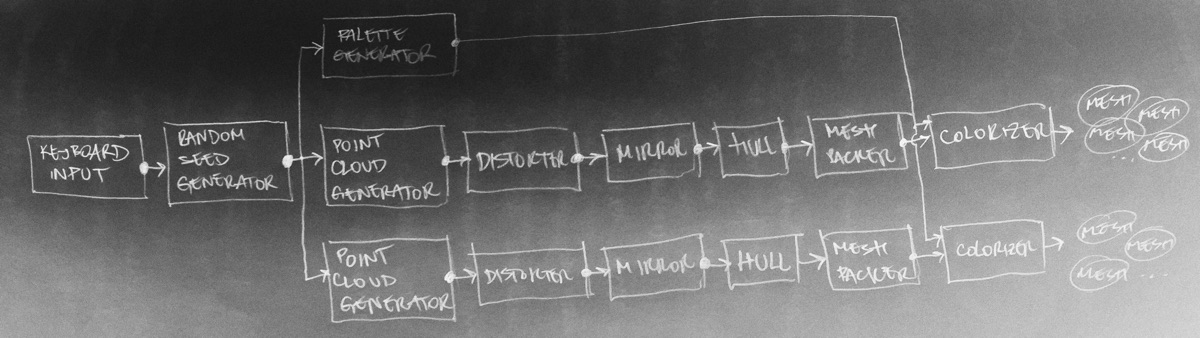
You can see two generator “tracks” because the final AE1 has two body generators – each of them starts at point cloud generation and produces its own meshes. There were three, but the last one didn’t make it.
Good stuff. Now, rewinding time back again, I had to start writing from somewhere. I did so from the geometry stage.
Geometry
I was inspired by particle systems and how turbulent forces (wind, water currents, etc) can influence the flow of particles through space. By taking snapshots of a set of points on their journey through the flow field, I could get “aerodynamic” 3D shapes. That was the core idea, around this entire project really.
Quickly, I sketched a rough point cloud generator (completely random points), a hack triangulation scheme (iterate through points in groups of three, make a double-sided triangle out of them, and pack it into the mesh), and a simple mesh mirroring component.
Not so bad for a first sketch, I could see where this was going. I added gyroscope controls and immediately liked how it was behaving in my hand. I wanted to do a kind of inverse scheme, where you’re inside the sculpture in its center and had to look around in all directions, but then you would never be able to grasp the sculpture in its entirety. So I left the gyro controls as they are currently, in the finished AE1. I might explore this alternative mechanic in another project, possibly to do with terrain exploration.
Next, I wanted to fix mesh triangulation. As I started researching the topic, I soon decided that I should simplify this step of the pipeline as much as possible. Mesh triangulation gets very complex very quickly, and I had different priorities. I went on searching for a convex hull algorithm, which would take an unordered set of points and “wrap” them in a convex mesh. Luckily there are quite a few implementations, as it seems to have been a hot topic in academic circles in the 70s. I chose QuickHull as it was efficient enough and had a very straightforward explanation. I always enjoy implementing graphics/geometry algorithms, so this step was a blast.
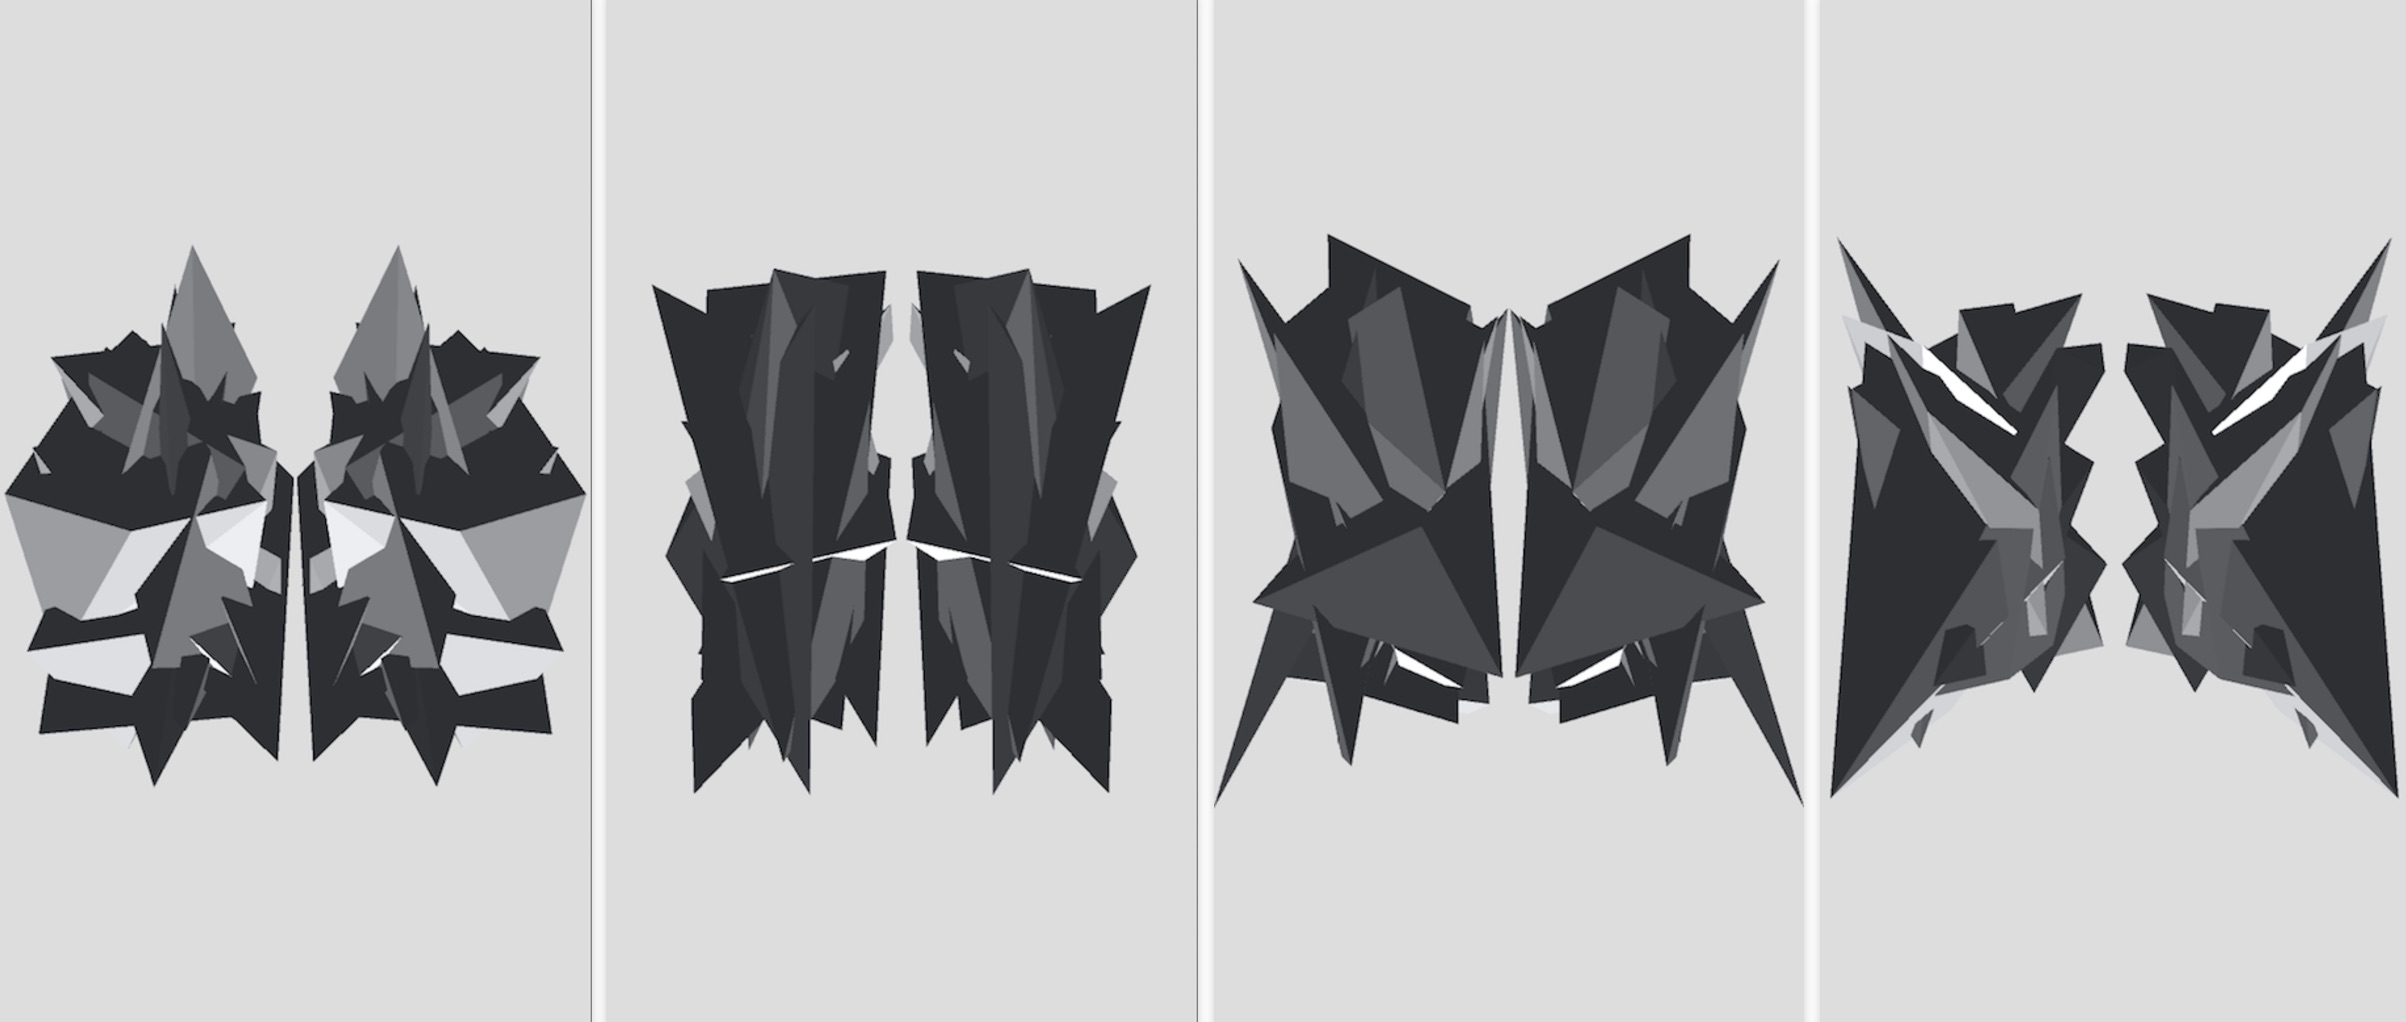
I have to admit, I look back at these early screenshots and kind of regret that the final AE1 is not configured to produce them Although it still could be, parametrically speaking. . There’s a simple beauty there. I might do a black & white edition of AE1 at some point.
Next, I started sketching the flow fields which would distort the point cloud. I started with a simple symmetrical flow field, with the YZ plane as the plane of symmetry:
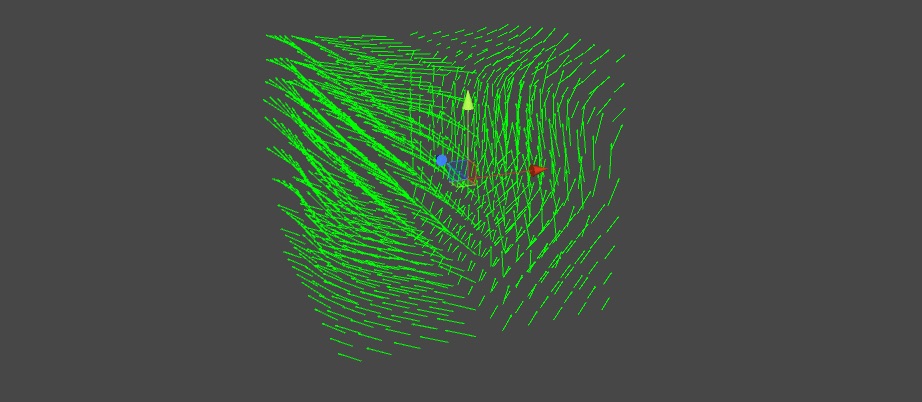
Looking good, now what happens when we apply it to the point cloud? Take a configurable number of points, duplicate each of them, move the duplicates along the lines of the flow field, then repeat the process (a configurable number of times) for the duplicated points:
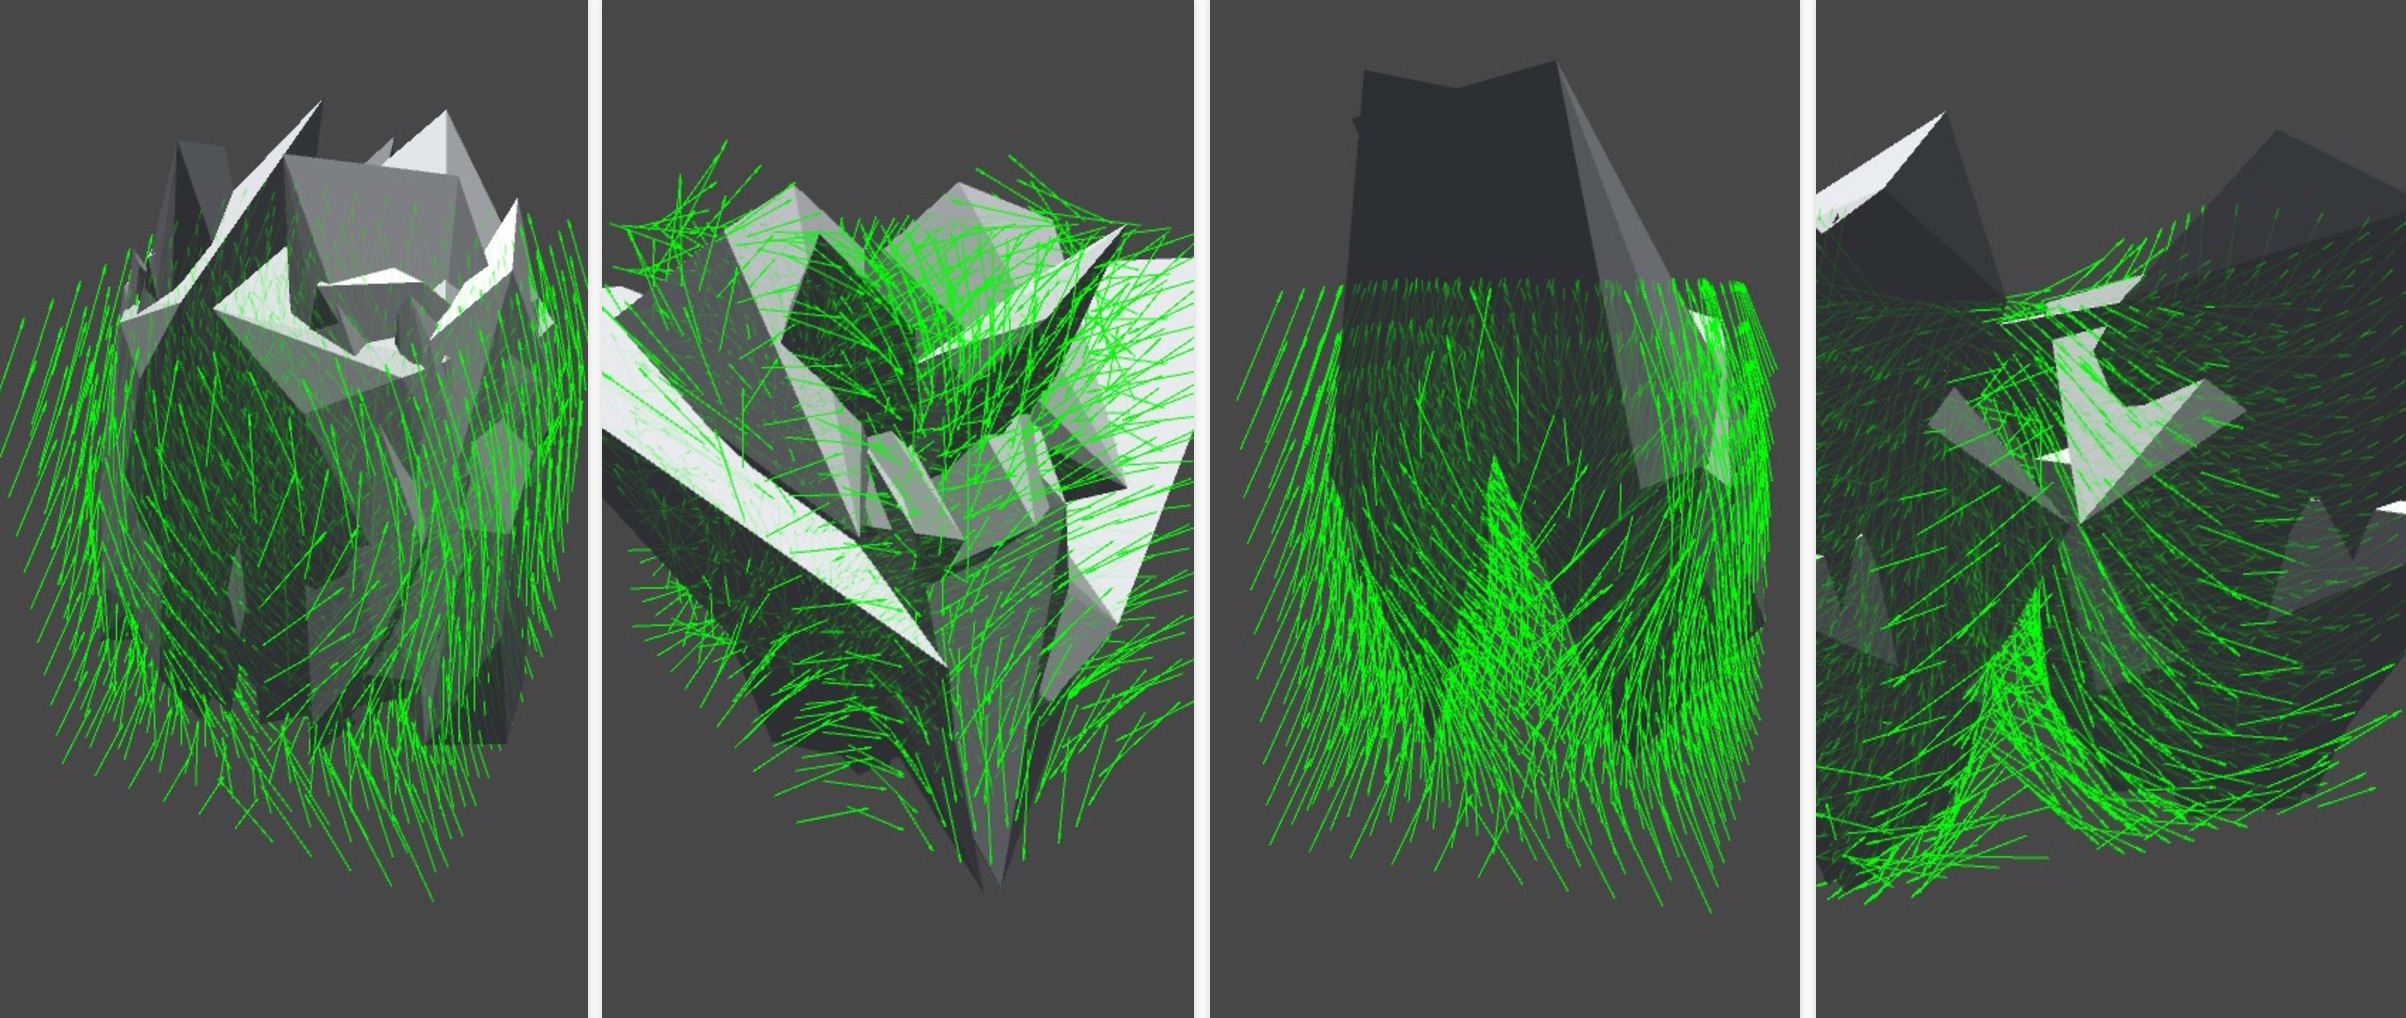
Seemingly looking good, but these are curated screenshots. The sculpture followed the flow field’s lines, but the problem was in the initial points. They were being generated completely randomly, so you could end up with weird looking things. I needed to fix this. I also needed to get some inspiration, so I went back and looked at more pictures of military aircraft.
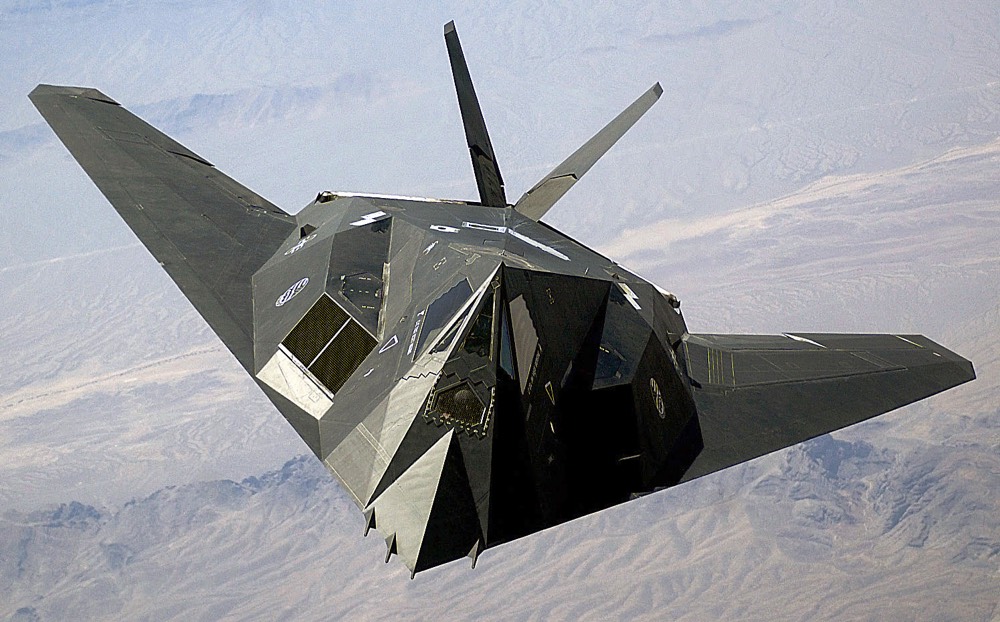
Well obviously the starting points have to be grouped together, and then expand and contract as they flow through the field. Taking the above photo as an example, imagine if the starting points are along the leading edges of the wings and nose, the very first part of the plane the air comes in contact with. This grouping has to be configured carefully, otherwise you’d end up with either big random blobs or a bunch of needle-looking things Someone said to me that AE1 “looks like anime hair”. I agree, reluctantly. .
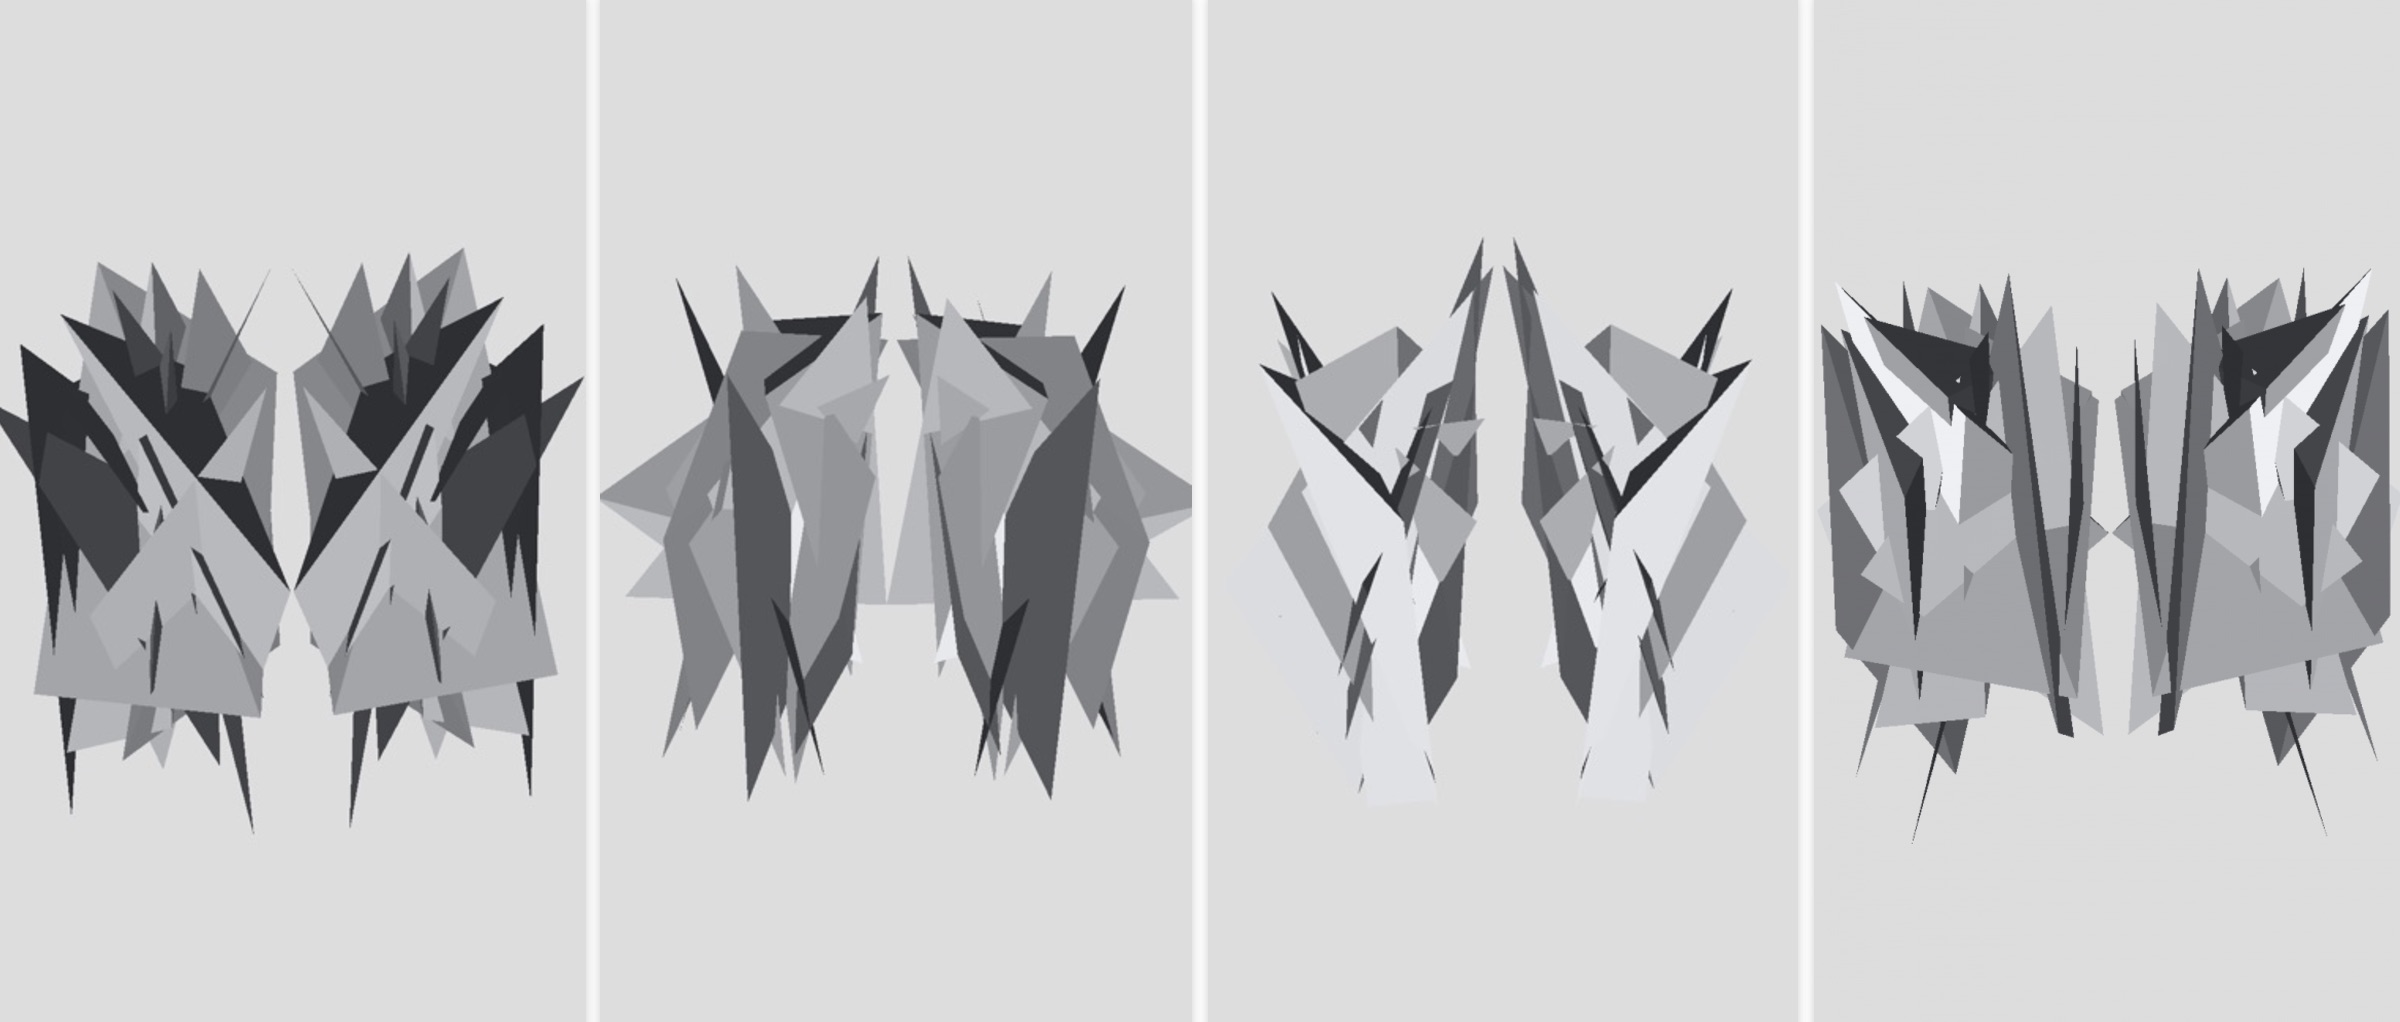
After iterating on the algorithm and fiddling with the parameters, I got to the point where I was mostly satisfied with the generated geometry.


It was time to do some color theory research.
Colors
I became interested in researching palette generation after using Adobe Capture CC on my phone for a couple of months. I liked how it pulled colors out of the photos I took in a smart way, and I started reading up on basic color theory and kind of reverse-engineering their web-based interface in my head, deducing how the algorithms worked. I figured that recreating the basic color picking algorithms and then making an iterative (infinite) palette out of those would be quite enough for this project’s scope.
I wanted to create a generator that would pick the base colors of the palette, and then produce an infinite number of similar colors via an iterator (pull-based). The motivation is that since the generated meshes will have no textures which add variety to the final visuals, having variety in colors but still having them feel as part of the same palette would be the right way to go.
Here’s an example image:
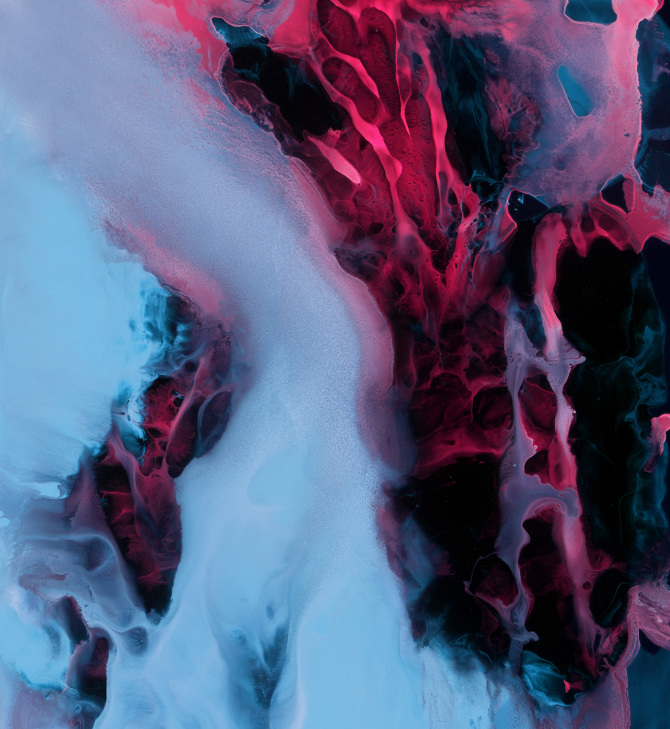
The color palette picked by Adobe Capture CC is this:

I spent the better part of the day fiddling with the web version of Capture CC and chose the color picking algorithms I decided I liked the most – Analogous, Monochromatic, Complementary, Compound, and added Random for good measure – and started implementing the palette generator.
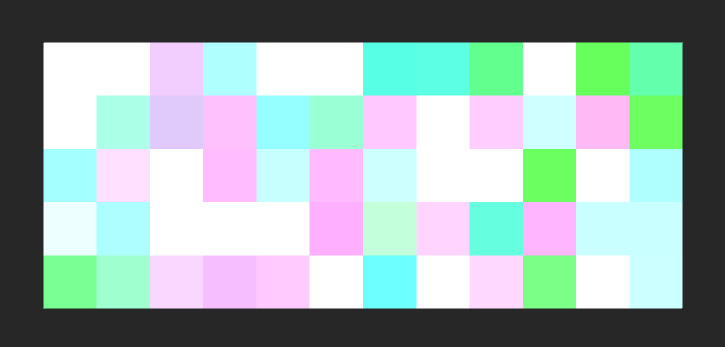
The color picking algorithms I mentioned are actually hue picking algorithms. All color operations are performed in the HSL color space since it’s much friendlier than RGB in terms of procedural generation. This is the first part of the generator that I sketched, and this is what it produced:
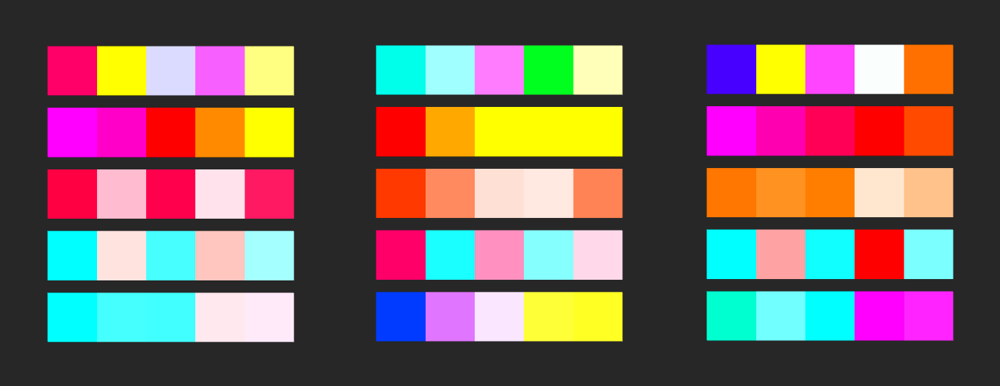
Each row is a different hue picking algorithm. Try to figure out which is which.
Next, I wanted to work on that iterator. The hue switching worked fine, but lightness was always being set to 0.5, which represents normal color brightness. As you can see in the first two rows of the screenshot above, the colors are different but seem kind of artificial and neon-like (the last three rows are messing with saturation so they’re less bright). I like “neon” color palettes and wanted to keep that as an option, but I also wanted a more diverse and parameterized approach. I sat down and did some more sketching and thinking.
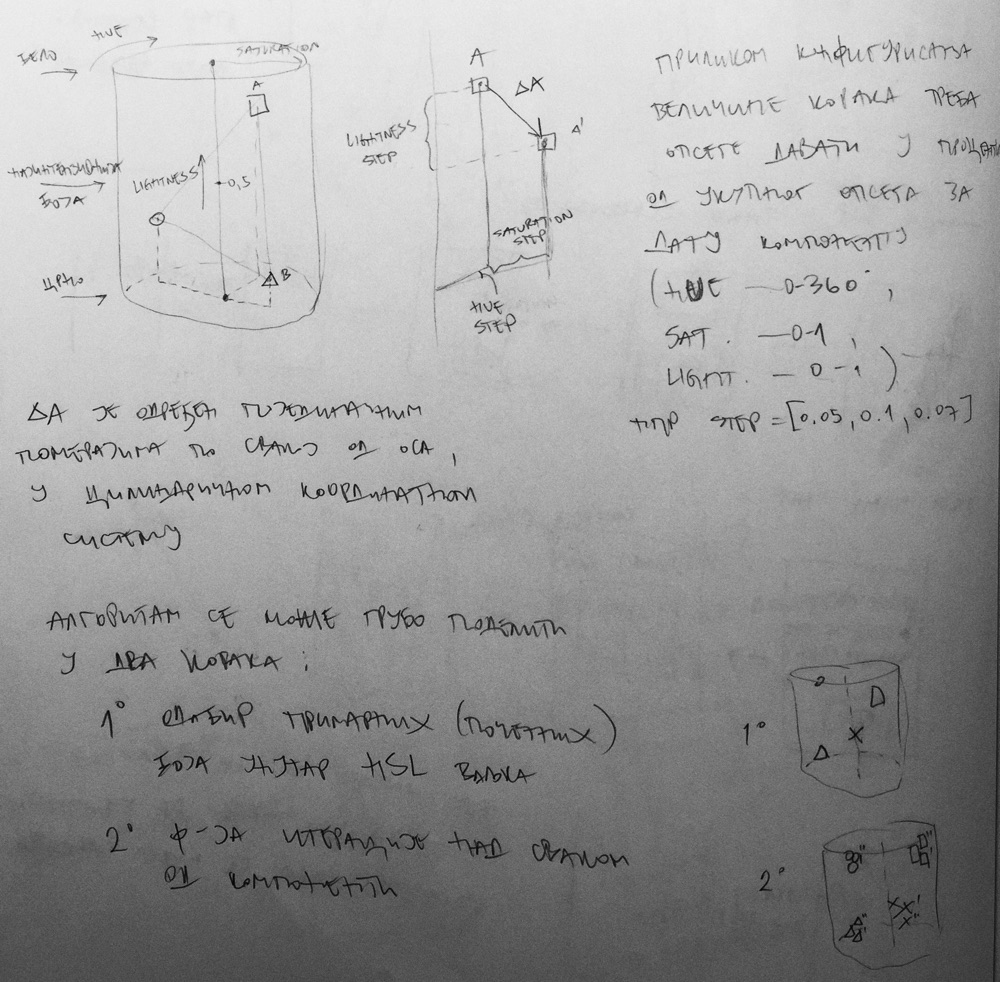
The iterator would have to walk around the HSL cylinder, but the colors it chooses while walking would have to be in the vicinity (in the cylindrical HSL coordinate system) of the primary colors of the palette. Here’s a photo of the final version of the palette generator in Unity, so I can go through and explain all the parameters:
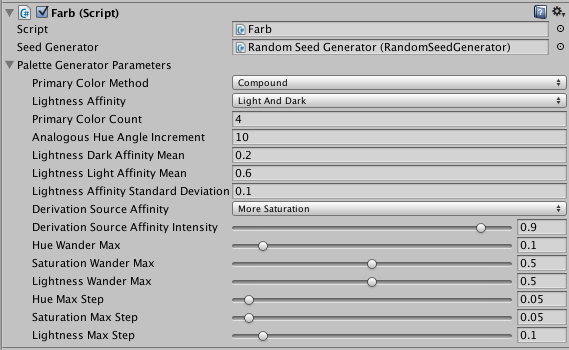
The parameters above Derivation Source Affinity are used for selecting primary colors, while everything below (including it) is used for derived (iterative) color generation.
Primary Color Method is one of the five color picking methods described earlier. It walks around the hue circle and chooses the hue for primary colors.
Lightness Affinity is used when picking the lightness value of the primary color. When this is set to None, a lightness value of 0.5 is always chosen, giving brightest (“neon”) colors. Light prefers lighter colors, Dark prefers darker ones, and Light And Dark oscillates between lighter and darker shades. All of the lightness affinity methods are using a standard probability distribution (“the bell curve”) with a configurable mean and standard deviation. I found the values you see in the screenshot to be the most balanced.
I chose four instead of five primary colors because the fifth one I think was adding a bit too much hue variance for this project.
Once the primary colors are generated, the iterator for derived colors kicks in. Its parameters have to do with a) the way the iterator chooses the next “source color” (I’ll explain), and b) the HSL-space “step” vector used as an offset from the source color to generate the next color.
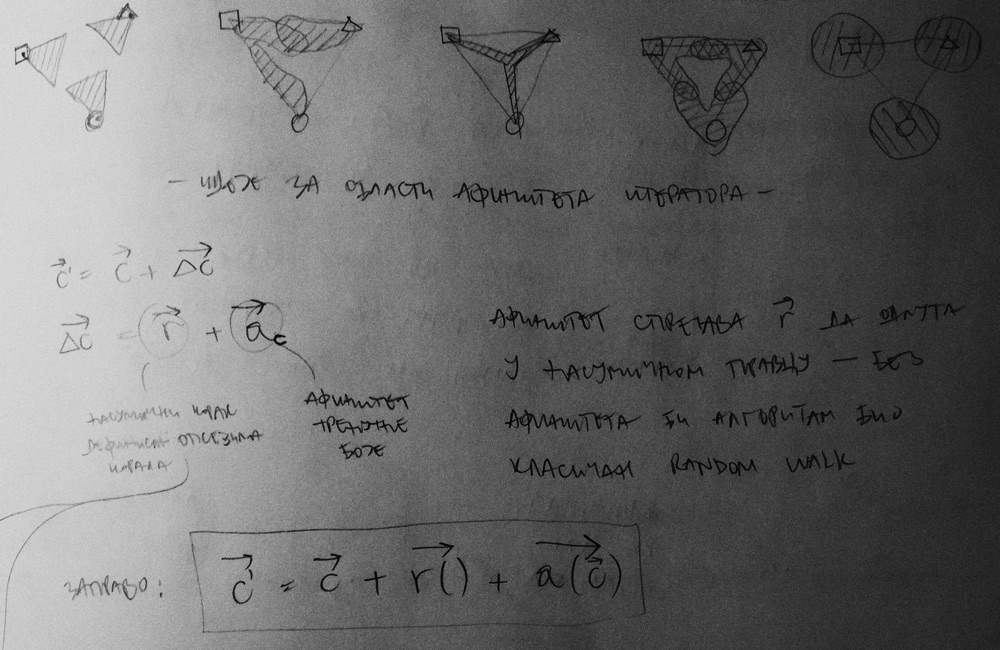
Whenever a primary color is generated, it is assigned its own “column”. When derived color generation kicks in, the iterator has to choose which column to pick as the source column. Once it selects the column, it takes the last color from that column and uses it as its source color. After that, the step vector is calculated and, adding the source color and the step vector, a new color is generated. The generated color is added as the last color in the column which it used as its source, and the algorithm repeats.
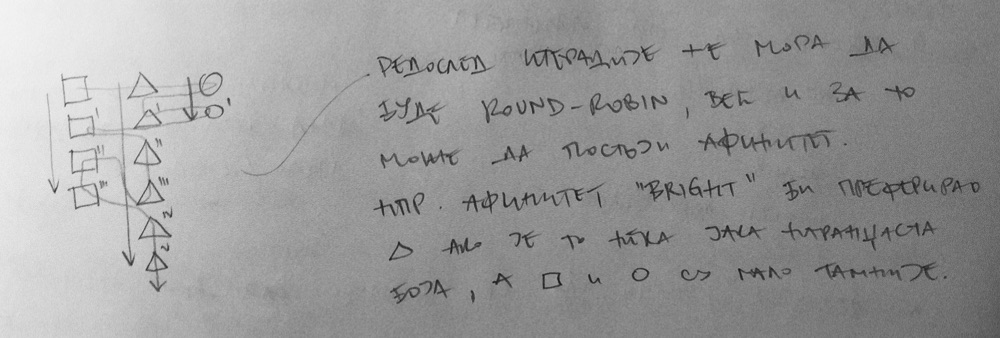
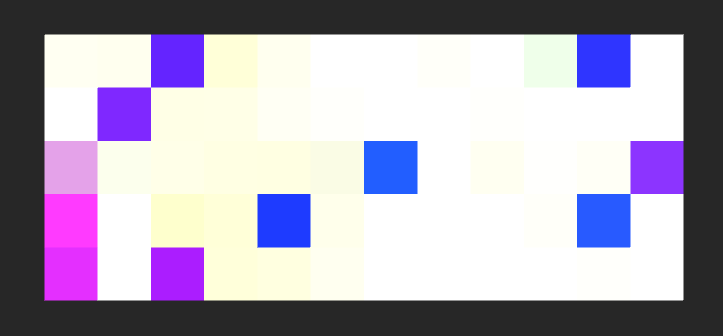
In this sketch, you can see a simple diagram of this process. The square, the triangle, and the circle in the first row represent primary colors, and all colors below them are derived colors using their column as the source. The snake-like line going through the diagram depicts one possible order of iteration. In this case, the triangle was the preferred color generating the most derived colors, with the square being just a bit less prominent.
This order of iteration is controlled by two parameters – Derivation Source Affinity (DSA) and Derivation Source Affinity Intensity (DSAI). DSA can have five different values – None, Less Saturation, More Saturation, Less Lightness, More Lightness. This is the preference of the iterator as to which of the color components it will take into account when choosing the column. The “intensity” of this decision (or, how often it is made) is controlled by the DSAI parameter. A value of 1 will always pick the most intensive column, ignoring others, while a value of 0 reduces the iterator to random column iteration. A value of 0.9 was chosen for the shipped product, with affinity set to More Saturation, as this gives very bright and live colors, with one color being just a bit more dominant than the others.
The step vector is controlled by a number of parameters, so that it doesn’t stray from the original source color too much. Hue Wander Max, Saturation Wander Max, and Lightness Wander Max set the bounds around the source color and create a cylinder slice within which the derived colors are generated. The Hue Max Step, Saturation Max Step, and Lightness Max Step parameters simply control the size of the step vector. Smaller values lead to palettes that diverge from the source colors more slowly.
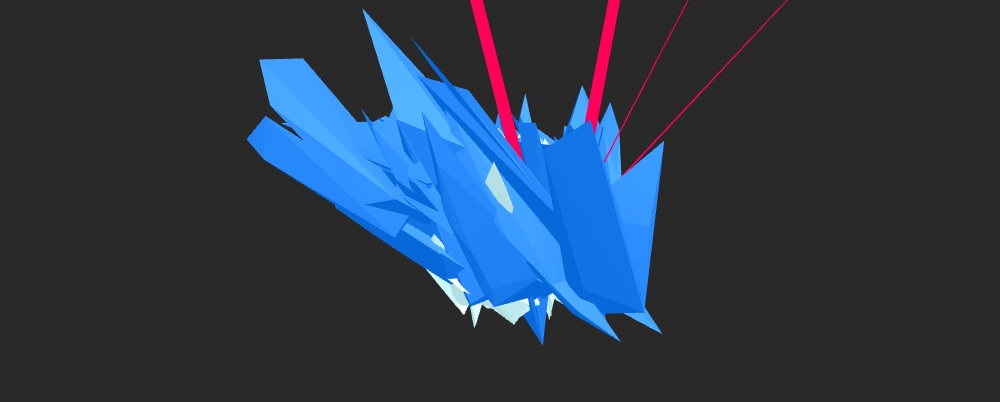
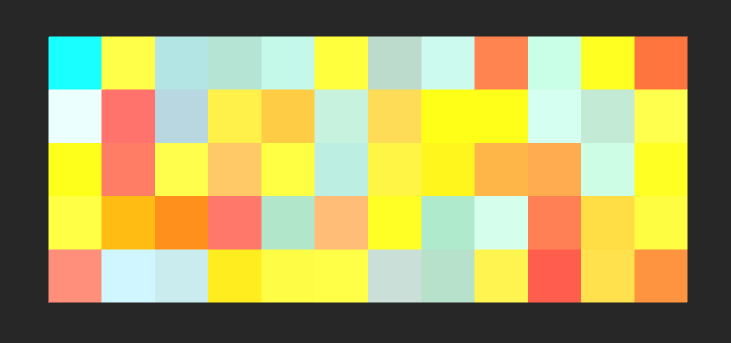
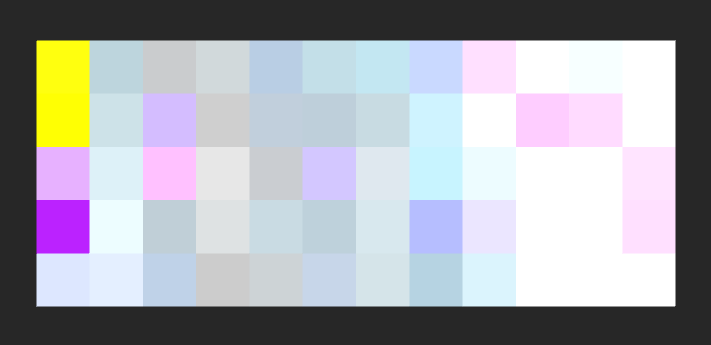
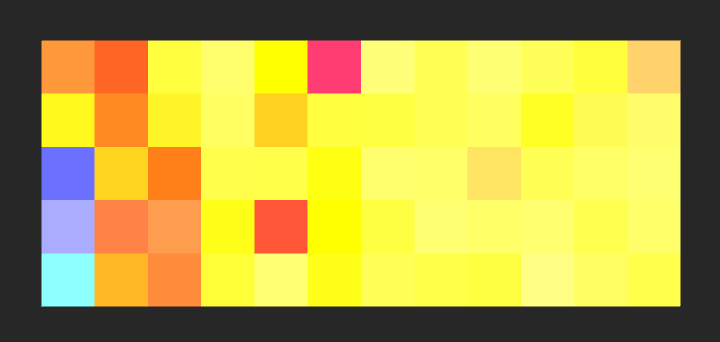
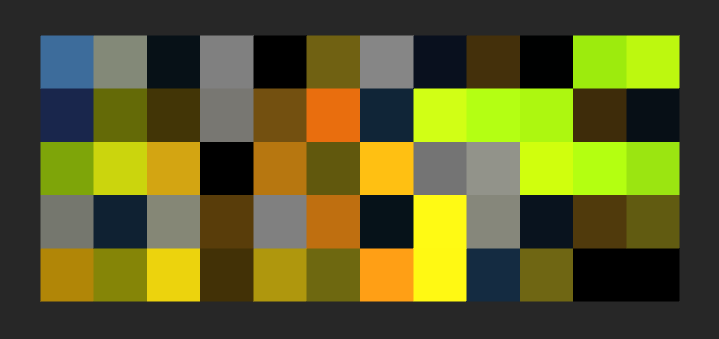
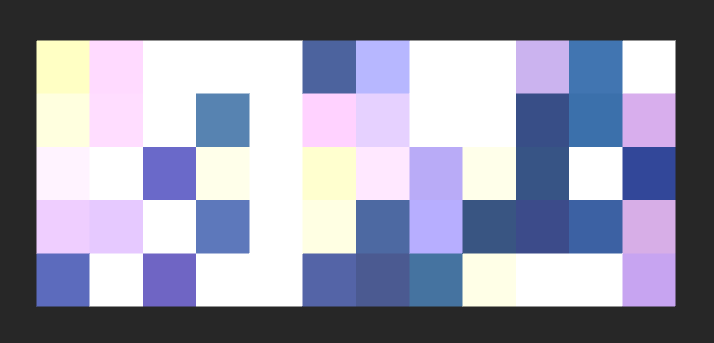
That’s a lot to digest, so here are a couple of screenshots illustrating different affinities. They are all using the Compound hue switching method, which I find the most beautiful among the ones available. Primary colors are in the leftmost column.

Color palette generation is definitely something I’ll be working on for a long time. There’s lots of space for improvement and I plan to make it more “personalized” in the future, adding my own hue switching methods and maybe even teaching it what I like/don’t like by training it with machine learning algorithms. The current version is a good first step, but I feel that it’s still too generic and lacks a personal touch.
Together
With geometry and color generation completed, I went on to merge these subsystems. Each batch of points that came out of the convex hull component would get colored by the next color that comes out of the palette generator’s infinite iterator. It all goes into the MeshPacker component which builds the final Unity mesh, assigning colors to each vertex.
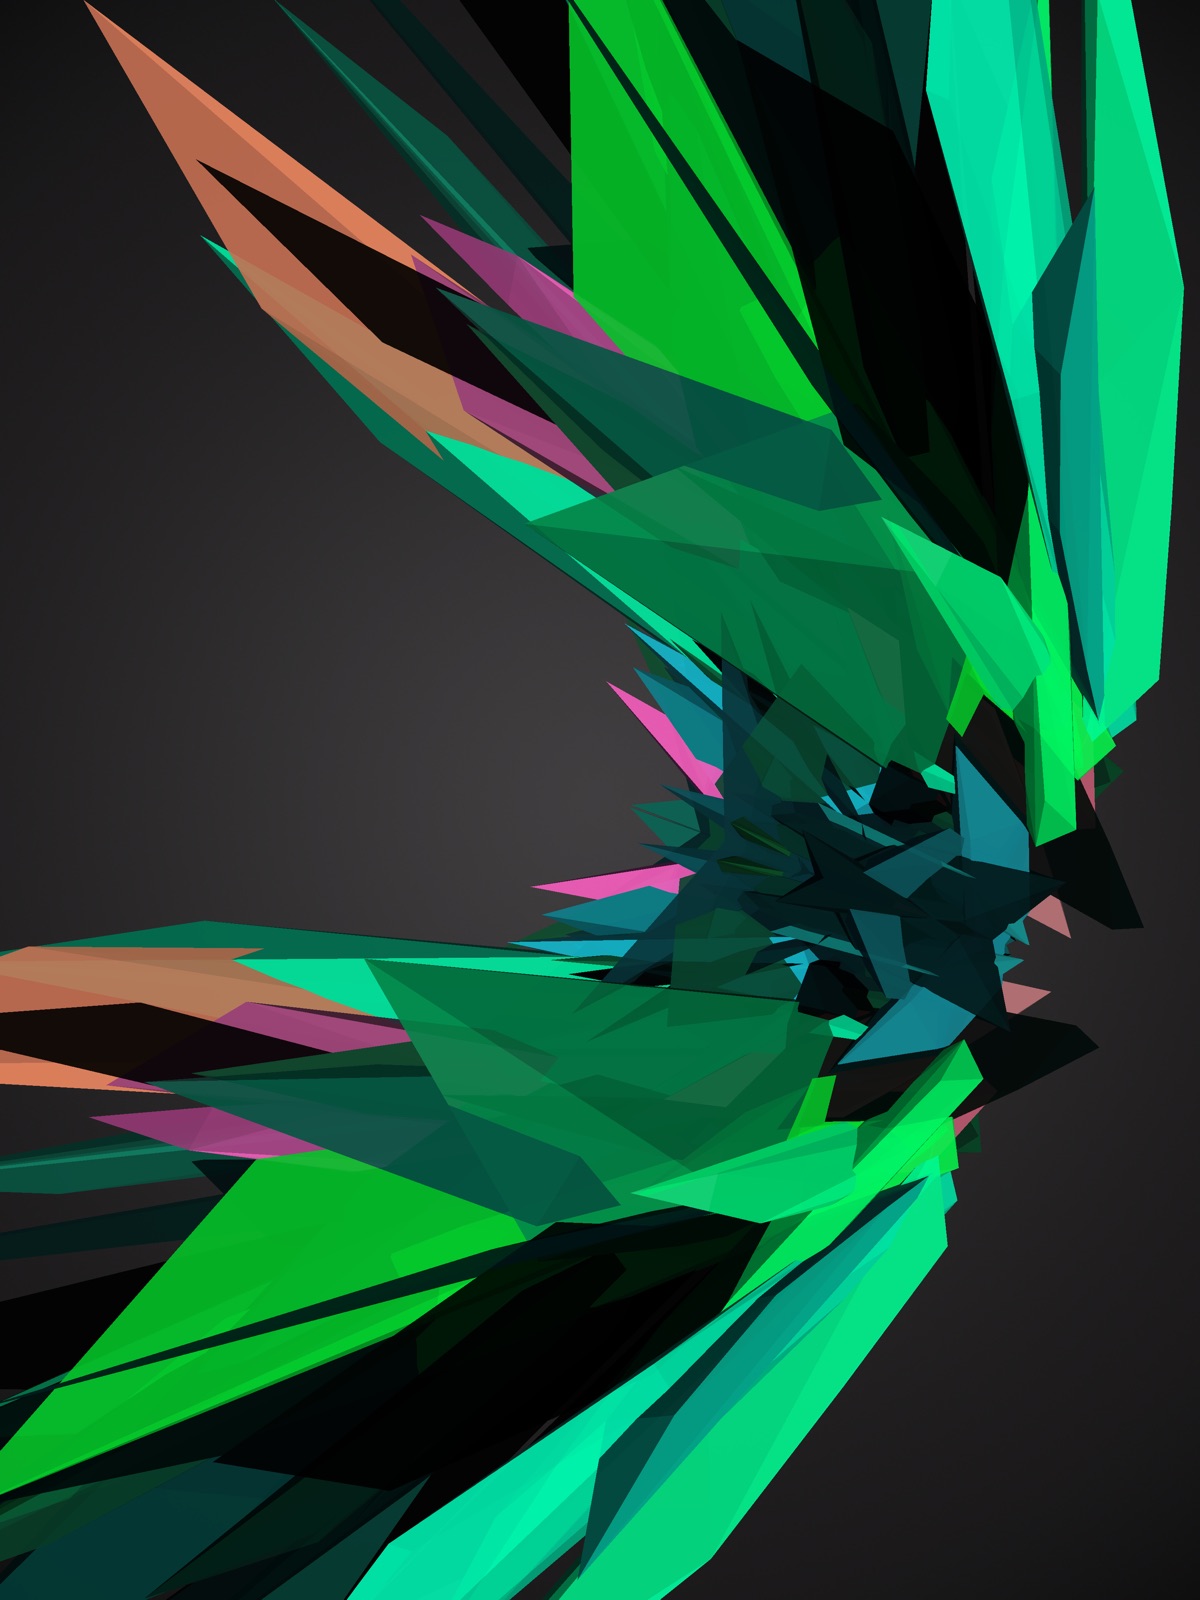
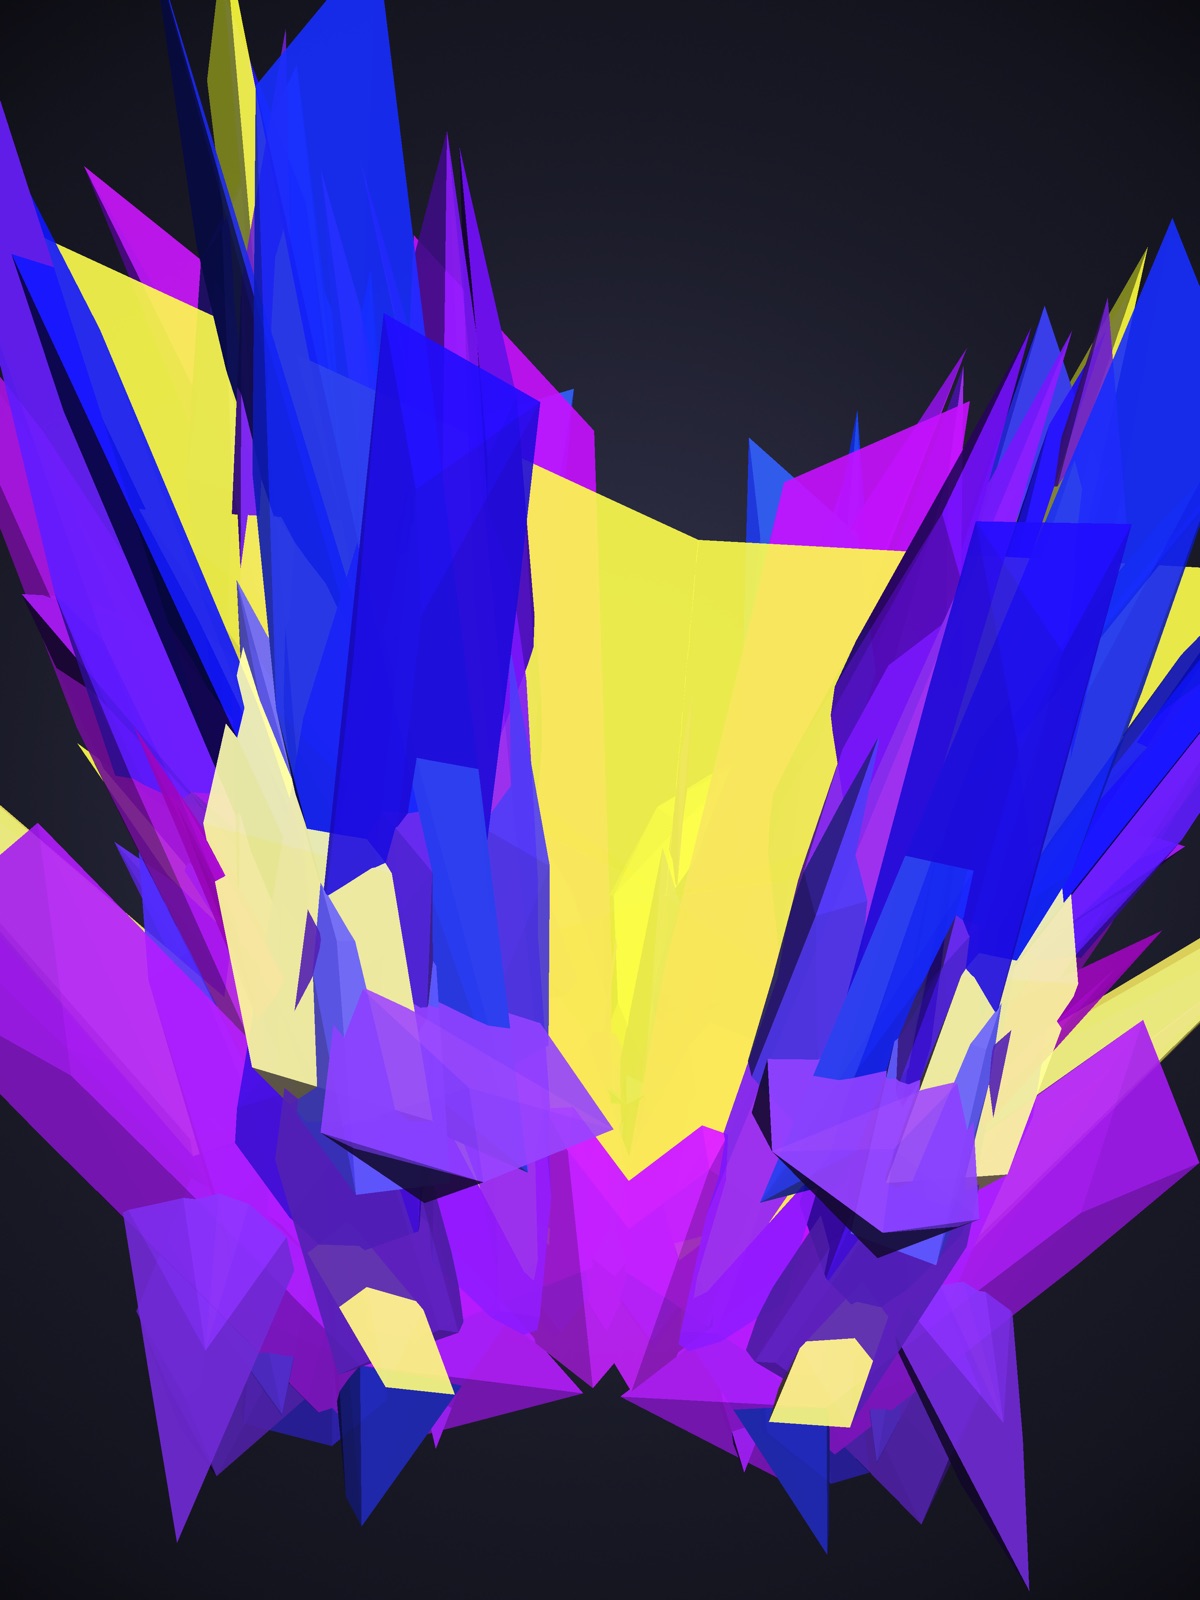
Finally, here’s how AE1 looks finished.


Problems and future improvements
Due to the limited scope and timeline of this project, I had to cut some corners. The biggest issue I have with the current version is the split-second freeze when generating a new sculpture. This is due to the complexity of the convex hull algorithm, and the fact that it runs on Unity’s main thread. I tried making my hull component run on a separate thread using UniRx’s Observable.Start and then returning to the main thread with ObserveOnMainThread, but that approach was too naïve and didn’t bring any speed improvements (it actually slowed the generation down). The hull component needs to be running on a separate thread all the time, not constantly switching from the main thread to the worker thread and back again. The inter-thread synchronization coupled with waiting for Unity’s next Update() was just killing performance. I weighed the cost of refactoring everything to use the “proper” approach and decided against it. For my next project using this streaming architecture, it will be mandatory.
The other problem I have is with seeded random generation. Currently, the app uses C#’s plain old System.Random, which works fine with single-threaded code. When I tried splitting hull generation onto a separate thread, the seeding was broken and the words typed in would no longer generate the same sculptures every time. So, a thread-safe seeded random generator will be a big area of research for the next project.
One final non-technical gripe – I think I maybe “over-standardized” the sculptures. They all look alike after a while, although I still find them visually appealing. I had more visual variety at the very beginning of the project (see the black and white screenshots), but they were harder to parameterize and control. I find this process the hardest and probably the most painful when working on generative things – under parameterize and you have uncontrolled but possibly beautiful results (albeit in a small number of curated cases), overparameterize and your results start to look alike. There’s an art to it, a meta-process, and I still haven’t found it.
In conclusion
I think I achieved everything I wanted
 with this project/product. I tested the architectural designs I had bubbling around for months and I built an aesthetically pleasing thing-that-makes-a-thing in under one month. So I’m satisfied, even though it’s so tiny in scope and there were endless ways in which I could have kept improving it and making it better. However, perpetual improvement would be missing the initial goal of building a quick project and shipping it.
Also, I like the entire “aesthetic engine” concept – a computational mechanism built for no other purpose than to please. Aren’t Aventadors built for the same goal?